Good morning. Happy AUGUST! It's Wendy here, and today, I'm playing with ink embossing and fake "letterpress."
I love the effect that texture adds to cards. But since cards are often meant for mailing, its important to keep mindful of the effect of both weight and heft. That's when embossing comes in, with such gorgeous and subtle effects.
Today, I'm taking it one step further, based on a technique that Tim Holtz demonstrated at the recent stamp show that I went to. He "letterpressed" a tag with distress inks. It was gorgeous. I wanted to experiment with it on a printed background to take a look at how much more depth it would offer. I started with a scrap piece of subtly printed Anna Griffin paper
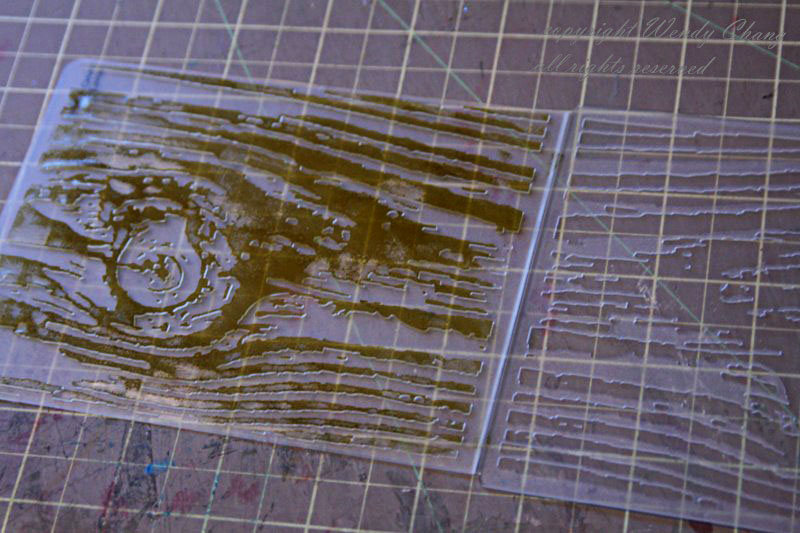
Next, take a plastic embossing folder - this one is from Tim Holtz's line with Sizzix - I love them because they are just a little bit bigger, and will cover the a2 size with the emboss. If you look carefully, you can see that the left side has a raised/embossed image - and the right side has the mirror of the design, in deboss/recessed. When the paper goes through the machine, it is pushed out from the raised side, and into the recessed side, giving you the image on paper.
I used chalk in for this project because chalk in is much more opaque and I wanted the printed image to be somewhat covered. A dye ink, which is transparent, will not do that. Ink up the RAISED side of your plate with your chalk ink
Lay the printed sheet print side down CAREFULLY over the inked image and carefully close your folder, taking care not to shift your paper at all
Run it through your machine, and you end up with this gorgeous textured piece that no longer looks like the Anna Griffin paper, but the print from it gives the piece additional depth because it was not a solid
Now, stamp and color your rubber romance image - see how her lower back stamped poorly? When that happens with me, I normally just use the image like normal.
Then I go in with a pen and fix the line. It is important to wait in the very end to do this, because the pens do not always work with the color mediums and can smear depending on your ink
Now assemble your card and you are done.

 I cut my card stock to 8.5 x 10.5. Then I scored it along the long side at 2.5, 5, 7.5 and 10 inches. I turned the card stock and scored one of the short sides at 2.5. Then you snip the scores along the short side (from the edge into the first score line).
 Fold along all score lines. Apply a strong adhesive to the bottom squares and along the .5 inch edge. Fold up the box and tape together.
 Here is what the undecorated box will look like. I squeezed in the sides a bit to bring the top together.
 Now the fun part! I decorated my box with some striped paper and Rubber Romance Judy (the atc sized one). I colored her with copics and cut and mounted her with some nesties.
 I used a scrap of yellow card stock to make the topper. I punched a decorative edge along the bottom. Then I put it over the box and punched holes through all the layers with a crop-a-dile. Tied a bow and done!
 Here is a look at the completed box again. I think it makes a cute little gift or party favor presentation.